Saturday, May 30, 2015

Crockpot Cheesy Chicken Spaghetti


This reminded me a lot of the Chicken Spaghetti Casserole recipe that I posted, but I liked this one better for two reasons: 1) it's in the crock pot, and I'm in love with the crock pot; 2) the addition of the jalapeños (sub for the can of diced green chiles in the original recipe) adds a nice extra kick of flavor.

This particular time I made it, I used one red and one yellow bell pepper, but you could use any color of pepper. Also, if you can find angel hair pasta, I think it would be even better than regular spaghetti.

Crockpot Cheesy Chicken Spaghetti
Serves 6 adults

1 lb of chicken (thawed or frozen)
1 small onion, diced
2 bell peppers, diced
5-6 jarred jalapeños, chopped
2-3 cloves garlic, minced
1 tsp. cumin
salt and pepper to taste
3/4 lb of spaghetti
3 cups of shredded cheese
a few splashes of water or chicken broth

Put chicken, onion, garlic, peppers, jalapeños, cumin, cream of chicken soup, and 1 cup of cheese in crock pot. Add a few splashes of water or chicken broth. Stir to mix everything together. Cook on low 7-8 hours, or on high 4-5 hours. About 20 minutes before serving, cook the spaghetti noodles. Take out the chicken and shred with two forks. Add back in the shredded chicken, along with the spaghetti noodles and the rest of the cheese. Stir well. Cook an additional 20 minutes and then serve.

Wednesday, January 21, 2015

Cream of Chicken Soup Substitute

I've linked to a recipe for this before, I think in my "Basics of Cooking in India" post, but I thought I'd go ahead and spell out the recipe on here to make things easier. 
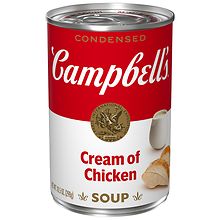
Unfortunately, this does not exist in India:
Sad, sad reality. Yes, I'm aware that making it from scratch is probably healthier from the "clean eating" standpoint, but truth be told, I'm all about convenience. 

However, India forces you to "eat clean" more often, so here's how to make a cream of chicken soup substitute from scratch!

First you need to make some chicken broth. Boil 1 cup of water and dissolve 1 chicken cube in the boiling water. You'll only need 1/2 cup of the chicken broth, so you can either pour the rest down the drain, or use it in whatever recipe you're making, or save it in the fridge/freezer!

Cream of Chicken Soup Substitute

2 TBS butter
3 TBS flour
1/2 cup chicken broth
1/2 cup milk
Salt and pepper to taste

Melt the butter in a saucepan. Add the flour and whisk for a minute until smooth and bubbly. Whisk in the chicken broth and milk. It will initially get really thick, then thinner, then thicken again as you continue to stir it over the heat. Add salt and pepper to taste. That's it!

This recipe equals about the amount of a can of cream of chicken soup! It's also versatile - you could add in some sautéed mushrooms to get cream of mushroom soup, or some sautéed celery to make cream of celery soup (does anyone ever actually use that for anything??). 

I use this in recipes in India allllll the time, so it's become second nature to make it. Takes a little more time than popping open a can, but it's pretty darn easy!

Tuesday, December 16, 2014

Cheesy Potato Casserole - India Proofed!

For Thanksgiving, we made all the traditional Thanksgiving side dishes, and one of the ones I was responsible for was the cheesy potato casserole (aka funeral potatoes). I had a few people ask me how I made them in India, so thought I'd just post the recipe here! I apologize that I don't have a picture...but just imagine cheesy, gooey potato goodness.

Please take note that you'll need to mix up the sour cream the day before you make the casserole. Also, I mixed up the casserole the day before Thanksgiving and refrigerated it overnight so I'd have less to do that morning. Just take it out of the fridge and add the cornflake topping before baking. 

Cheesy Potato Casserole

1 kg (2 lbs) potatoes
1 onion, chopped
2 cups shredded cheese
1/2 stick of butter, melted
2 cups of sour cream (recipe below)
1 recipe of cream of chicken soup substitute (recipe below)
2 tsps salt

Topping:
1/2 box of plain cornflakes, crushed
1/2 stick of butter, melted

To make the sour cream (make this the day before you mix the casserole, it needs to sit overnight):
1 small box of the "fresh cream"
2-3 heaping spoonfuls of dahi
Open the box of cream, and pour off as much of the liquid as possible. Squeeze the solid part into a bowl. Add 2 heaping spoonfuls of dahi and stir. Taste, and if it tastes too creamy and not very sour, add one more spoonful of dahi. Refrigerate overnight. You'll need to double this recipe for the casserole, but you'll probably have some sour cream left over. (Stir in some powdered Ranch dressing mix to make a great veggie dip!)

To cook the potatoes:
Bring a large pot of water to a boil. Wash the potatoes well. Place the whole potatoes in the boiling water. If the potatoes are very large, boil for about 15 minutes, but if they are smaller, boil for just 10 minutes. Transfer to a bowl of cold water. Remove the skins (they should come off fairly easily). Grate the potatoes on the large holes of a cheese grater.

To make the cream of chicken soup:
2 TBS butter
3 TBS flour
1/2 cup chicken broth (made with water and a chicken cube)
1/2 cup milk
salt & pepper to taste
Melt the butter, then whisk in the flour. Whisk in the chicken broth and milk. Stir over medium heat until thickened. Add salt and pepper.

Now, to assemble the casserole. In a large bowl, mix together the shredded potatoes, onion, 1/2 stick of melted butter, 2 cups of sour cream, 2 cups of shredded cheese, cream of chicken soup, and salt. Stir well. Transfer to a 9x13 baking dish and press down the top.
In a bowl or ziplock bag, mix the crushed cornflakes and 1/2 stick melted butter. Sprinkle over casserole.
Bake at 170 degrees Celsius for 45-60 minutes. 

Sunday, October 12, 2014

How to Freeze Broccoli

This may be totally obvious and easy to everyone, but I know this was a useful skill for me to learn, and something I had never done in America. Freezing broccoli!

Reasons I love to freeze broccoli:
1. You can't buy frozen broccoli in India. Boo.
2. Broccoli is also not available year around here. Learned that the sad, hard way when broccoli was out of season and no where to be found for several months.
3. I always have broccoli on hand, so if I ever have an oops-I-forgot-to-plan-dinner day, I can easily whip up my Chicken & Broccoli Stir Fry.
4. It makes me feel better that more of the bugs have been killed and removed throughout the process.
5. It's partially cooked through, so when it comes time to use it in a dish it takes less time to cook that fresh.

Here's a step by step how to freeze some broccoli for yourself!

1. Trim your broccoli from the stem. I personally love broccoli but hate the stems, so I trim mine very very close to the leafy part. You can make fun of me if you want, I'm totally secure in my 5 year old eating preferences.

2. Clean your broccoli. This is the part where I kind of freak out in India. Growing up in America, I remember my mom always soaking fresh broccoli in salt water to encourage any little buggies to come out. Multiply that by 1,000 in India where I have very low expectations of their cleaning abilities (aka watching tiny cock roaches crawl all over the fresh produce at the grocery store. Yep.). Or maybe it's because I've seen the little bugs floating in the water after I boiled it to freeze. So I'm a little over zealous about cleaning the broccoli here (which is one reason I love going through all the steps of freezing it!)  Combine a few tablespoons of white distilled vinegar and a teaspoon or so of salt with several cups of filtered water (tap water is fine in America). Let your broccoli soak in the vinegar water for about 10 minutes, swishing it around a couple of times during the process. Drain the broccoli and rinse with more filtered water.

3. Bring a pot of water to a boil, and then we're going to blanch the broccoli. Basically that means cooking it for just a few minutes and then quickly cooling it down to stop the cooking process so it doesn't cook all the way through. Add the broccoli to the boiling water and boil for 3 minutes.

4. Prepare a bowl of filtered ice water. After the 3 minutes of boiling, drain the broccoli and immediately add it to the bowl of ice water. Let it soak in the ice water for 3 minutes, swishing it around a couple of times.

5. Drain the broccoli, and spread it out on a kitchen towel to dry. The drier you let your broccoli get at this point, the fewer ice crystals will form on it in the freezer.
See how close to the leaves those are cut? Perfect! :)

6. After the broccoli is dry, put it in a Ziploc bag - I happened to bring some Ziploc freezer bags from America, so that's what I used, but you could use the Indian brand. Or you could also use an air tight plastic container if you don't have plastic bags. In an ideal world you could even portion these out into smaller bags so you're not exposing the broccoli to the air every time you open the bag to take some out, but I don't have any smaller bags from America, and the ones in India are just too expensive to justify that. I haven't had any major problems in this area though.
Suck out as much of the air as possible (I even used a straw and literally sucked extra air out). Pop the bag in the freezer. 

Done! 

Friday, October 10, 2014

BBQ Chicken Sandwiches - Crock Pot

Ohhhhhhhh my.


So this is my newest favorite meal to make.
It was SO.EASY. 
And delicious. 

My husband is from the Kansas City area, the land of the BEST barbecue. (I will not be entertaining any arguments from any Memphis style BBQ fans. Bleh). We also had catered BBQ at our wedding. So I appreciate some good BBQ. And this BBQ chicken was great! I chose to cook it in the crock pot, which made it oh so simple, but cooking it on the stove top would also be easy. (I'll include directions for that below).

In my recipe, I've doubled the amount of sauce you make vs the original recipe in my cookbook, because I personally like my BBQ to be drowning in sauce.

So if you're in India and you have a crock pot, you've probably figured out by now that they tend to cook things on like, supercharged power, so it takes less time than in America. I would only recommend cooking this in the crock pot for about 4-5 hours on low here, but you'd probably need to up that time in America some and either do high for 4-5 hours or low for 6-7.

Hope you enjoy these as much as we did! I adapted the recipe from a cookbook I got here, so all the ingredients are available :)  (well, assuming you have some brown sugar).

BBQ Chicken Sandwiches

2 chicken breasts, thawed not frozen
3/4 cup onions, finely chopped
5-6 garlic cloves, minced
2 TBS oil (I used olive, but you could use vegetable)
1- 1 1/2 cups ketchup
1 1/2 TBS vinegar (the recipe says apple cider is best, but I only had white)
7 TBS brown sugar
2 tsp. salt
2 tsp. cumin
A few shakes of red pepper flakes

I sprayed my crock pot with cooking spray, and then added a splash of water (seriously a splash, hardly any) in the bottom just to keep the sauce from drying out or burning. Place the chicken in the crock pot.
In a bowl, combine all the other ingredients and stir together. Pour the sauce over the chicken. Cook on low for 4-5 hours (if you're in India, longer in America).
About 20-30 minutes before eating, take the chicken out and shred it, then return it to the crock pot and stir to mix. If the sauce is too runny, you can stir in a little extra ketchup and brown sugar, then let it cook the extra 30 minutes with the lid off to thicken up.
 Serve with burger buns (I just bought some from the grocery store...which I've never completely understood why they have those when they don't eat hamburgers...) They're extra tasty if you spread some butter on the buns and then toast them on a  griddle or in the oven first!

** Stovetop directions:  Sautee the onions and garlic in the oil for 5 minutes. Add all the other ingredients, except the chicken, and simmer for about 5 minutes. Stir in the 2 precooked chicken breasts, either shredded or diced. Simmer for a couple more minutes for the chicken to absorb some flavor. 

Wednesday, October 8, 2014

Crock Pot Chicken Noodle Soup

I love chicken noodle soup. I mean, who doesn't? Well, I know that some people don't actually like it...but I'm not one of them! Thankfully, this is a very easy dish to make in India!


This is one of those great recipes where you literally throw everything in the crock pot and let it cook all day, making your house smell heavenly. I think if you had a cold the smell alone would heal you. The only extra step involved is shredding the chicken and adding the noodles in for the last 30 minutes. 

Most recipes you find for chicken noodle soup call for egg noodles, but since those aren't available in India, I just use regular corkscrew rotini noodles. And this might seem shocking...but I maybe like them even better. The jury's out...I'll have to wait till I have some chicken noodle soup at Panera when we're back in America, and then I can truly decide which noodle I like better. :)

Also here's a side tip: At least in Kolkata you can't consistently find celery year round. So when I do see celery, I buy extra, clean, chop and freeze it for the times I want to make soups and it's not available. 

Crock Pot Chicken Noodle Soup

2-3 chicken breasts, frozen or thawed
1 cup of chopped carrots
1 cup of chopped celery
1 large or 2 small onions, chopped
3-4 cloves garlic, minced
2 bay leaves
1 tsp basil
1 TBS parsley
1/2 tsp thyme
salt and pepper to taste
6-7 cups of water
5 chicken cubes (sub the water and chicken cubes with chicken broth if you have it)
1/2 pkg of rotini noodles

Throw everything in the crock pot except for the noodles. Give it a stir, and cook on low for 6-7 hours or high for 4-6 hours. (I would cook it at least 5 hours if the chicken is frozen).
In the final 30 minutes of cooking, take out the chicken and shred it. Add the chicken back in along with the pasta noodles, and stir.
After 30 minutes, check the seasoning and add salt and pepper if needed. If the noodles have soaked up too much of the liquid, add a little more water or chicken broth. 

For stovetop instructions if you don't have a crock pot, click the original recipe link. 

Friday, September 26, 2014

Bean and Cheese Burritos

Why break up the filled tortillas trend in posts when I can introduce these babies:
 Ummm, yes, I did in fact take two bites before I remembered to take a picture. Couldn't help myself. So I apologize for the misshapen blob my two bites caused. Still worth it.

This all started when my friend Nicole Instagrammed a picture of her son eating a bean and cheese burrito. She said she freezes them and then pulls them out for quick lunches. The light bulb came on and I asked myself why I haven't thought of that in the 14 months I've lived here! It was only a matter of a few days before I just had to try them out for myself. 

I looked up a few recipes for homemade refried beans on Pinterest. Of course they all call for pinto beans, which of course don't exist here, but Nicole said she just uses the plain "red rajma" beans...I don't know what those are called in America. If you're in America, get pinto beans. In fact, get canned ones and save yourself the trouble of cooking them from dry beans. My recipe, however, includes the dry beans :)

After my first batch, I was slightly obsessively hooked. I've already made them 2 more times since then, and even already promised my mom to make her homemade refried beans when I'm home because they're so much tastier than canned! Hope you find these as delicious as I did...you may never need Taco Bell again.

Bean and Cheese Burritos
(this recipe makes enough beans for 6-7 burritos, depending on size of tortillas)

1 cup dry red rajma beans
1 medium onion, finely chopped
4-6 cloves of garlic, minced
3 tsps cumin powder
1-2 tsps chili powder
1 tsp paprika
Dash of salt and pepper
1 TBS butter
Splash of milk

Soak the beans overnight, and then cook them in the pressure cooker, if you have one. I find these beans take a long time to get soft, so I let them go in the pressure cooker for 20-30 minutes. If you don't have a pressure cooker, you'll either want to simmer the beans on the stove or in a slow cooker for several hours.

After the beans are cooked, melt the butter in a sauce pan, and add the onions. Cook for 2-3 minutes, then add the garlic and cook another 1-2 minutes. Add the beans, along with a little bit of the liquid they've been cooking in. Add all the spices and stir together. Allow this mixture to cook for 10 minutes or so, stirring frequently and adding splashes of milk if it starts getting too dry.

Now it's time to mash the beans. You can use a fork or potato masher, or if you're like me and like really smooth refried beans, use an immersion hand blender or an actual blender/food processor. I like mine best in the blender because it makes them more like a puree. You'll probably need to add a couple more splashes of milk if they're seeming too dry. Just play around with it till it's the consistency you like in refried beans.
Now spoon a blob of beans onto a tortilla and sprinkle with cheese!
Fold the two sides in first, and then roll up carefully to keep all the insides on the inside. 
You can eat immediately, or if you're going to freeze, allow the burrito to sit open for a couple of minutes to cool a little bit. Then roll carefully, wrap well with plastic wrap, and store in a freezer Ziplock bag. 
To thaw, cover the burrito with a wet paper towel, and microwave for a minute on one side. Turn the burrito over and microwave for another 30-60 seconds.

The beans also taste great with some cheese mixed in eaten with tortilla chips!